
 In the winter in North Central Ohio, we get a lot of snow. One really awesome thing to do is to build a Quinzhee or Quinzee snow structure.
The quinzhee is surprisingly big on the inside (you will be shocked). The walls of a quinzhee are thick and strong, and in the daytime the interior glows. On a dark night, a quinzhee lit with a candle glows yellow from the outside.
Once constructed the quinzhee is not only warm, but very safe.
We’ll walk you through how to easily (or relatively easily that is…) build a Quinzhee, but first, let’s discuss other snow structures and why they are not as good to build for the typical backyard owner or casual camper.
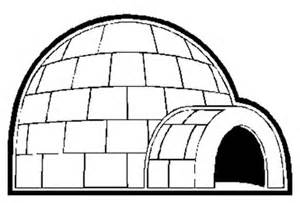
The Igloo
The igloo to me is the ultimate snow structure. Who doesn’t want to build an igloo? Unfortunately, many of us have tried and failed to build an igloo because we just don’t have the right conditions.
An igloo is made by cutting blocks of packed snow with a saw and then stacking them in a circle and building the circle up in a way that the sides gradually slope inward ultimately forming a domed roof.
In my experience, the igloo gets about three or four feet high and then collapses, or I give up from sheer exhaustion.
The main problem with building an igloo is that unless you live somewhere that gets a serious amount of snow, you will not have enough packed snow on the ground to use a saw to cut out blocks. This is just not going to happen unless you are way up north.
What people try to do instead is to get a container to use as a mold to make snow bricks. The idea is to pack snow into a mold, turn it over, and pop out the blocks.
Unfortunately this only works under perfect snow packing conditions, and then usually doesn’t work anyway. Even if you have perfect conditions the snow bricks are not properly sintered (more on that later).
The Classic Kids Snow Cave
The next option for a snow structure is the classic snow cave we made as children. Building it involves piling up a bunch of snow from the yard and then packing it down (usually by sledding on it or flinging your indestructible child body on it for hours, wrestling with your friends).
Once satisfied with your mound, a kid tunnels into it and clears out the snow from the inside until there is a snow cave.
The problem? These structures are extremely dangerous! If they collapse, the people inside can suffocate and die.
I remember as a kid, going around and looking for massive amounts of snow left by plow trucks and tunneling into them. This works, but what we didn’t realize as kids is that there are hundreds of pounds of snow sitting right above your head.
The classic kids snow fort can be a disaster waiting to happen. An additional worry is that often kids will be inside the tunnels, while other kids are climbing on top!

Not looking too good there, Tommy
Luckily there is a third option that is fairly easy to build and is not dangerous to be inside once completed.
The Quinzhee
According to Wikipedia, the quinzhee gets its name from the Athabascan tribe of Native North Americans. Some folks refer to this type of structure as a Lumitalo, which is a European term for a similar snow structure.
In a nutshell, the quinzhee / quinzee is a smooth, symmetrical snow dome with walls about 8-10 inches thick.
Our small quinzhee. Unfortunately we forgot to smooth the outside of the structure. Oh well, it still worked!
Once constructed, if the ceiling were to collapse, one could easily free themselves, given its broad, domed shape and thin walls.
In fact, if constructed properly, your quinzhee will glow inside, usually a brilliant blue or yellow color because the sunlight penetrates the thin walls of the structure.
During a dark, moonless night a single candle inside the quinzhee is enough to make the whole structure glow yellow when viewed from the outside.
Another great thing about the quinzee is that it can be made with any type of snow from dry powdery snow to moist snowball packing snow.
How to build a Quinzhee Snow Structure
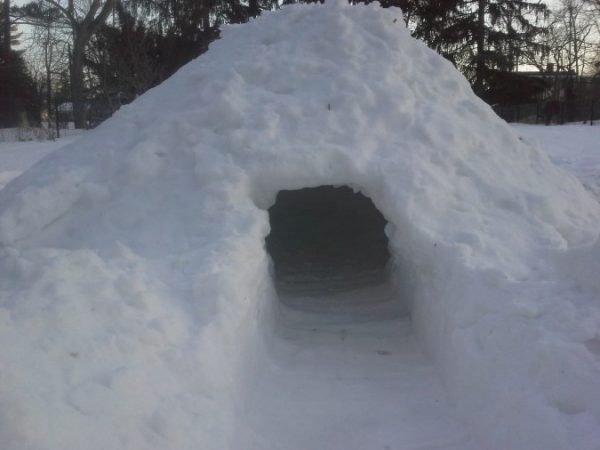
1. Pile snow. Similar to the classic child’s snow cave, the first step to quinzhee construction is to pick a spot and shovel snow into a pile about 6-10 feet high and 8-10 feet in diameter. Although a quinzhee can be built to any size, these measurements give the quinzhee a really cool igloo feel and will accommodate several adults at once.

We did not build ours as high as desired, but that’s OK!
Get some friends and shovels and make a giant pile of snow, taking care to build the pile up symmetrically. The easiest way to achieve a nice symmetry is to throw each shovelful of snow directly on top of the pile and let the snow fall where it may.
Do not pack the snow down, but rather, just keep throwing shovelfuls. (keep throwing and throwing…and throwing…)
2. Smooth it. Once your pile is built up to your satisfaction, the next step is to smooth the outside. {we forgot to do this on our pile, and it still worked, but the walls will not be as strong}
Go all around the snow pile and gently smooth and pat it down with the back of a shovel or with your hands. It doesn’t have to be perfect, but you don’t want to have clumps of snow jutting out anywhere.
Ideally when completed, the whole mound should be smooth. There is no need to try to jump on the pile and pack down the snow. In fact, this will probably only hurt the shape of the pile. The packing process will be taken care of in the next step.
3. Sinter it. The next step is absolutely necessary. Go away and let the pile sit for several hours; the longer you can let the pile sit, the better. If camping, go on a hike or do other things.
If home, plan to let the snow “set” overnight. Leaving the snow pile alone for 5 to 12 hours allows the pile to go through a sintering process in which the snow crystallizes and becomes very strong.
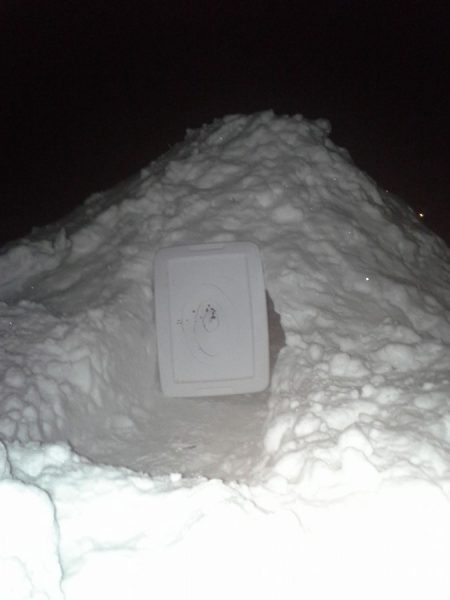
4. Make a door. Decide where to put the door. Position the door as low and small as possible on a side where the wind will not blow in). Tip: I start the door by inserting a tree saw like and cut out a block that will be the door. I then proceed to cut out more blocks deeper inside, and a tunnel leading to the inside of the quinzhee begins to take shape.
At this point, your body is still outside of the structure. Do this as far as you can reach in comfortably and then use a shovel to continue to dig the tunnel.
5. Dig.Now for the fun part. {This part of the process is dangerous. I have been building quinzhees in my backyard for a decade and have never had one collapse in on me, but it is still important to be very cautious. To be safe just have someone outside with a shovel handy in case of a collapse.}
Once you have a tunnel that reaches the center of the pile, crawl into the tunnel and begin to carve out the inside of the quinzhee. For this, I use a hand trowel, but any small tool will work.
The key is to get to the center and then to carve out and remove snow all around you. To keep the structure in balance you would not dig a lot in one direction, but rather dig in a circular motion, taking care to remove snow 360 degrees around you, gradually.
This symmetrical digging will help to keep the structure from collapsing. Prepare to get snow all over yourself as well as occasionally in the face!
Once you begin to carve out a space for yourself inside the quinzhee, I find it best to have someone on the outside with a shovel removing the snow from the tunnel as you are throwing the newly carved out snow into the tunnel. Take turns with a friend or two.
6. Carve and sculpt.Eventually you will have a large space in the center of the quinzhee carved out, and you may be concerned that you could accidentally dig through the walls to the outside–don’t be concerned.
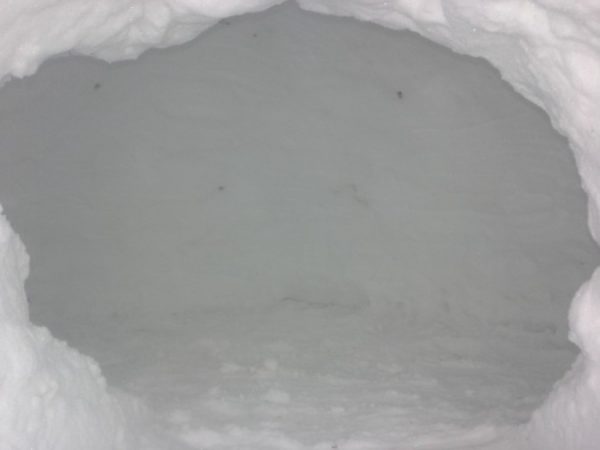
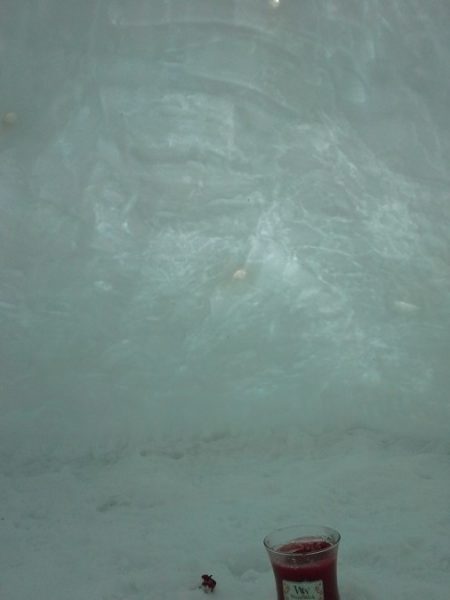
This is the cool thing about this structure. Continue to carve out the space until you start to see a glow to the walls. This is the sunlight coming through. The neat thing about sintered snow is that it is translucent to about 8-12 inches thick!
Once you see the faint glow, you know not to carve any more in that spot. Continue to remove the carved snow out through the tunnel, hopefully with the help of a partner.
Important: At some point when the quinzhee is near completion, take a stick or pole about a 1/2 inch in diameter and punch 2-3 holes from the outside of the structure into the structure (about 2 or three feet down down the top the top). These are air holes — you need these!
7. Make it glow. Continue to carve out the structure until all parts of the walls are glowing! You will notice that the lower parts of the structure will allow you to carve out much more snow than the higher sections. Remember you are making a dome. Once all of the inside of the quinzhee is glowing, you are finished.

The inside of the quinzhee should be carved out in a dome shape
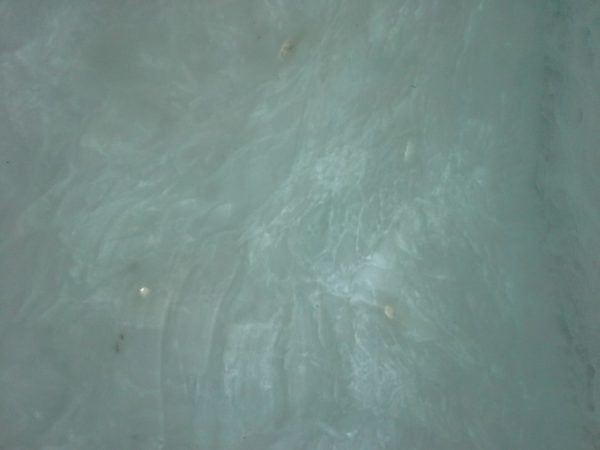
From the inside of the quinzhee, the walls are glowing. That’s when it is time to stop digging.
By this time, the inner walls should be smooth from all of the scraping. Run your gloves all around the inside walls to make the snow even more smooth and then take care to dig out the floor and remove all of the snow that you can, down as far as is desired.
Don’t dig down to the grass of course or else things will get messy. At this point, in my opinion there is no more danger. Even if the ceiling collapsed, the dome is so broad that 8-10 inches of snow would not trap you.
8. Fire it.Now for the really cool part! At night, get a tapered candle and position it in the center of the floor of the Quinzhee. Light the candle, crawl back out and put something over the door such as a backpack. We use the lid from a large plastic tote. Cardboard could also work. You may find that the quinzhee is glowing yellow from the outside!

Firing our quinzhee
Let the candle burn down until it goes out. Once the candle is out, remove the cover from the door and let the quinzhee sit overnight again. (if you are camping, you may not be able to do this part, and that’s OK).
What happens is that the candle heats up the walls of the quinzhee and liquefies them a little. Then when you remove the door cover and let it sit overnight, the freezing air rushes in and the walls ice over and become very strong.
9. Enjoy.Kids absolutely love these things! Don’t let them climb on top of it, or it will break. Due to the glazed walls, I have had parts of a well-made quinzhee last until mid-Spring!
Tip for extra awesome: Build another quinzhee or multiple quinzhees next to the main one and connect them together!
Time estimate: This time around I made the snow pile by myself in about 1 hour and the next day dug it out in about 2 hours.
It was about 6 feet high and ten feet across. I messed with it for another hour to get it really smooth inside, which you wouldn’t have to do, but at that point it is a work of art 🙂
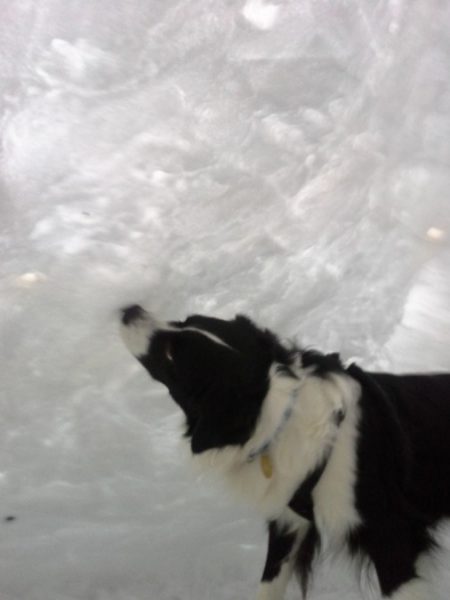
Our Sprollie inside the Quinzhee
amzn_assoc_placement = “adunit0”;
amzn_assoc_search_bar = “false”;
amzn_assoc_tracking_id = “trybackfarm-20”;
amzn_assoc_ad_mode = “search”;
amzn_assoc_ad_type = “smart”;
amzn_assoc_marketplace = “amazon”;
amzn_assoc_region = “US”;
amzn_assoc_title = “Items you may enjoy”;
amzn_assoc_default_search_phrase = “snow fort”;
amzn_assoc_default_category = “All”;
amzn_assoc_linkid = “7a8bd5a27e2e774aba4813ab8726761a”;
amzn_assoc_rows = “2”;
Check out these products as well!