Permaculture people like to practice a “no till / no dig” policy in their gardening.
Most folks in Permaculture agree that one should never till your soil for a number of good reasons. There are fascinating Youtube videos and articles out there on the topic of soil science and why one should basically let nature handle things under the surface.
We have articles on this topic as well.
Basically, once you have a garden plot established, you do not want to disturb the soil at all from that point on.
You ideally should not even walk on the garden soil, or it can become compacted which is why it is good to set up access paths around the plants.
In order to allow soil to become as productive as possible, rather than dig in and disturb the natural workings underground, the idea is to keep throwing down mulches on top of the garden soil to continue to raise the fertility.
Mulches are organic material like hay, straw, compost, grass clippings, leaves (don’t throw your leaves away! Read why in our article about how raking is unnecessary), cut up weeds, shredded newspaper, wood chips (go easy with these), manure, and things of that nature.
Over time your soil will improve as these materials deteriorate and decompose on top of the soil, just like what happens in the forest. Check out our article on soil improvement.
The only problem with a no till / no dig system is what to do when just getting started. Obviously you can’t just throw vegetable seeds into the lawn, right?
Establishing a new Garden Plot
Obviously when you want to convert a patch of lawn into lush garden you are going to have to do something to get the ball rolling. As I see it, there are two options.
Option #1—Sheet Mulching
One method to get the garden started is known as Sheet Mulching which is used successfully by urban and suburban gardeners. The really cool thing about sheet mulching is that if you have the time and the materials, you can convert a patch of lawn, compacted soil, or even concrete, into a garden plot without ever touching a digging tool.
I have seen YouTube videos of people who have sheet mulched abandoned concrete city lots into lush gardens using only sheet mulching.
I will have a separate post on this in the future, but basically this involves waiting until Fall and then covering the grass with cardboard, and then covering the cardboard with layers and layers of mulchy things like manure, leaves, hay, compost, etc., until it is about 3 feet high.
Then, you wait for Spring to roll around and you plant into what’s left of the decomposed pile of material, ultimately cutting through the cardboard to place each plant. The cardboard remains under there and acts as a weed barrier, until it slowly decomposes.
While you can see that this method may not always be practical in home gardening, I can testify that it really works wonderfully if you have the materials and the time. However, the way it usually works out for me is that I have some extra plants that didn’t fit anywhere, and I decide that I want to convert some more lawn into a lush garden…today.
For that, we need option #2.
Option #2—The Double Dig
The double dig sounds crazy, but it works wonders. Double digging a garden bed works better that tilling, although it is more labor intensive. Just remember that you only are going to do this once per garden plot to get your backyard farm going, so go for it!
What is it
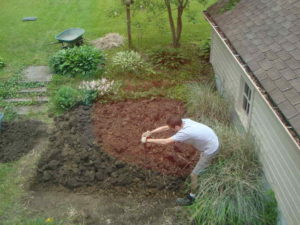
Basically you map out where the new backyard farm plot will be, remove the grass, and then blend the crap out of what is under the grass, resulting in very loose soil that goes down about 20 inches.
Map it out
Decide exactly where this new plot will go by laying out a string or stakes as a guide for digging. I recommend doing a small area, and then if you still want more garden, add another small area, and so on.
Remember what they say about nature having no straight lines, and take the opportunity to add some aesthetically pleasing curves to your landscape if you like.
Remove the Grass
With a spade shovel or the even better spade fork, remove all of the grass in the plot, trying not to take too much soil with the grass clumps. Cut manageable sections of the turf first and then lift them out and into a wheelbarrow to be carted off and thrown into a pile somewhere for later use.
Note that these clumps can be used later for building Hugelkultur mounds or turned back into usable soil. Don’t compost these unless you can get all of the soil off: never throw soil into the compost bin. (read about our method of composting.
Dig #1
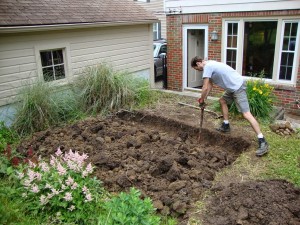
Using a spade or digging fork, stab the tool straight down and all of the way into the ground, and then pull back on the handle to pop loose a section of soil. Proceed in a systematic way all around the plot starting at the border and working in, until all of the soil, up to the depth of your tool, has been loosened.
Remove the loose soil. Using a shovel, remove all of the soil that you loosened and toss it near the dig site, because it will be going back in later.
Once this step is completed, the new plot should be about 6-8 inches below the rest of your yard.
Dig #2
Using a digging fork or spade, proceed just as in Dig #1, going around and loosening the soil. The only difference is that this time you will not remove any of the soil.
This step is the hardest because you are likely down into the subsoil now, which in Ohio is hard clay. Don’t kill yourself– just loosen the soil as best and as deep as you can.
Fill it back in
Now shovel back in all of the soil that you removed from Dig #1. Do not pack it down; in fact, try not to step on it at all. The goal is to have the soil be as fluffy as possible.
When you are done, the garden plot should now be a few inches above the rest of the lawn–this is good.
Plant away
Congratulations! Put the plants in and mulch all around them. Never leave spots of bare soil. Always fill in any bare soil with mulch.

Thanks for reading, and please share this article if you found it helpful.
